Cooking at home can reduce food costs, but it also creates work that rarely appears in the meal plan. Fine droplets of oil rise from the stove, settle on nearby doors and trim, and gradually hold dust. By the time the surface feels sticky, one quick wipe may no longer be enough.
Jerome, the founder of EverydayWise, experienced this while raising two children in a two-income immigrant household. Cooking dinner and packing four lunches helped the family spend much less than frequent takeout or restaurant meals. But repeated stovetop cooking—especially the meat stir-fries he enjoyed—left greasy residue around the cabinets and range hood. When dishes and cleanup were postponed, each return to the kitchen felt harder than the last.
His experience is not evidence that every household should cook, clean, or divide work the same way. It does show why kitchen grease is often more than a stain: it is the accumulated result of ordinary meals, limited time, and a cleaning task that became too large to begin.
You do not need to attack that buildup with the strongest product you can find. The safer decision is to identify the cabinet finish, begin with the mildest reasonable method, work in small sections, and stop if the finish changes.
The practical rule: Loosen grease gradually, use as little moisture as the job allows, and dry each section promptly.
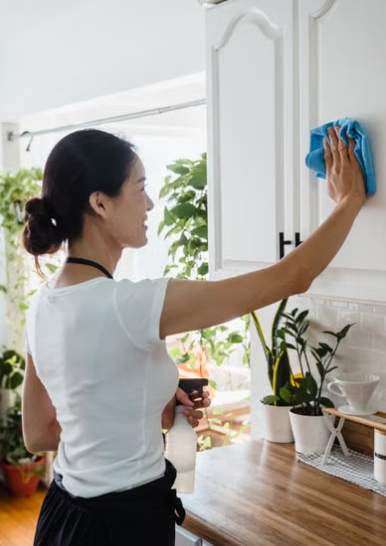
Before You Clean, Identify What You Are Protecting
“Kitchen cabinet” describes a structure, not one cleaning surface. A cabinet door may be solid wood, wood veneer, painted medium-density fibreboard, thermofoil, laminate, acrylic, or another engineered material. A factory-applied finish may tolerate a mild dishwashing-liquid solution, while a damaged, refinished, waxed, or specialty surface may require different care.
If you know the cabinet brand, start with its care instructions. Check renovation records, an invoice, a label inside a door or drawer, or the manufacturer’s website. If you rent, ask the property owner or manager before using a product that could alter the finish.
When the material is uncertain, look for warning signs before adding moisture:
- peeling or lifting film along an edge;
- cloudy, cracked, flaking, or worn finish;
- swollen seams or fibreboard;
- exposed raw wood;
- loose veneer;
- discoloration from an earlier cleaner; or
- paint that transfers to a damp white cloth.
Cleaning cannot restore a failed coating, swollen substrate, or delaminating surface. If damage is already present, limit moisture and seek material-specific advice. Do not treat a structural or finish problem as stubborn dirt.
Even when the surface appears sound, test the planned method inside a door or on another inconspicuous area. Apply it exactly as you intend to use it, wipe it away, dry the spot, and inspect it after it has fully dried. Look for color transfer, dullness, softening, tackiness, swelling, or a change in sheen.
Manufacturer instructions take priority over a general recipe, including the one in this article.
Gather a Small, Controlled Cleaning Setup
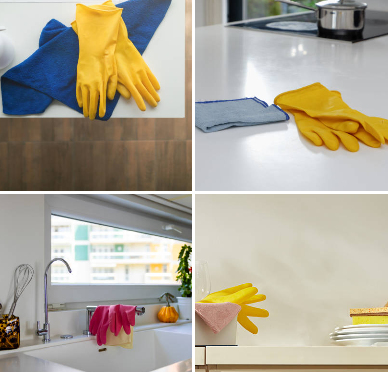
For many intact painted, stained, laminate, or high-gloss cabinet surfaces, a modest setup is enough:
- two or more clean, soft cloths;
- fresh warm water;
- a small amount of mild hand-dishwashing liquid, if the manufacturer permits it;
- a dry soft cloth, with microfiber where the finish instructions call for it;
- a bowl or container for the diluted solution; and
- gloves if the product label recommends them or your skin is sensitive.
MasterBrand advises that warm water and a clean soft cloth are often sufficient, with a mild hand-dishwashing-liquid solution for additional grime. It distinguishes hand-dishwashing liquid from automatic-dishwasher products and tells owners to rinse with a clean damp cloth and dry the surface.[1] KraftMaid likewise warns against abrasive cleaners, scouring pads, powdered cleansers, and excessive or lingering moisture.[2]
Those instructions are a useful starting principle, not a universal formula for every cabinet. Avoid improvising a mixture of vinegar, baking soda, bleach, ammonia, solvents, oils, polishes, and commercial degreasers. A substance described online as “natural” can still dull, soften, abrade, discolor, or penetrate a particular finish.
Do not mix cleaning products. The U.S. Centers for Disease Control and Prevention warns never to mix household bleach—or any disinfectant—with other cleaners or disinfectants because dangerous vapors can be released.[3] For ordinary grease removal, cleaning with a compatible soap or detergent is the relevant task; disinfection is a separate decision.
Ventilate the kitchen when the product label calls for it or when odors or vapors are noticeable. Keep children and pets away from the active work area, and keep products in their original labeled containers.
Use a Five-Step Degreasing Method
The goal is not to soak the grease. It is to give a compatible cleaning solution enough contact and gentle agitation to release the residue without allowing liquid to enter seams, edges, hinges, or the cabinet core.
1. Start with one small section
Choose one door or a defined section near the cooking area. Remove loose dust with a clean dry or barely damp cloth. Dust mixed into wet grease can become a gritty film, so do not begin by scrubbing a dusty surface.
If handles can be safely removed and reinstalled without damaging the door, removing them may expose hidden residue. Otherwise, clean around them carefully. Avoid flooding screw holes or hardware openings.
2. Dampen the cloth instead of spraying the cabinet
Prepare the manufacturer-approved solution. Dip the cloth and wring it out thoroughly. It should be damp, not dripping.
Applying liquid to the cloth gives you more control than spraying the door. Overspray can reach adjacent walls, counters, food, hardware, seams, and the spaces behind door edges. It may also leave cleaner on the surface longer than intended.
3. Loosen the residue with light passes
Wipe a small area using gentle, overlapping passes. Follow the grain direction on wood or wood-look surfaces when the manufacturer recommends it. Give extra attention to the upper corners, recessed profiles, handle area, and the cabinet side nearest the stove, where hands and airborne grease often overlap.
Do not respond to slow progress by pressing harder. Re-wet and wring the cloth, make another light pass, and change to a clean section of fabric as it picks up soil. If the residue remains, pause and check the finish instructions before increasing product strength or contact time.
A soft cloth wrapped around a finger can reach a groove more safely than a sharp tool. Do not use a knife, scraper, abrasive sponge, melamine foam, or stiff brush unless the cabinet manufacturer explicitly approves it. A tool can remove the finish before it removes the stain.
4. Remove cleaner residue
Use a second clean cloth, lightly dampened with fresh water, to remove the loosened grease and remaining cleaning solution. This step matters because detergent left behind may form a film that looks streaky or attracts new soil.
Rinse or change the cloth frequently. Moving the same saturated cloth across every door can redistribute grease rather than remove it.
5. Dry the section immediately
Finish with a clean, dry, soft cloth. Pay attention to seams, profiles, edges, the area around hardware, and the bottom of the door. Then inspect the surface from more than one angle.
If the section is clean and the finish is unchanged, repeat the process on the next small area. If it becomes cloudy, sticky, lighter, darker, rough, or soft, stop. Remove any remaining product as directed and consult the manufacturer or a qualified cabinet professional.
Treat Heavy Buildup as Several Small Jobs
Old grease may contain cooking oil, dust, smoke residue, hand oils, and remnants of earlier products. Trying to remove all of it in one aggressive session increases the chance of damaging the finish and makes the task difficult to close.
Divide the work into zones:
- the doors and side panels closest to the cooktop;
- the handles and the surrounding hand-contact areas;
- upper trim, profiles, and corners;
- cabinet faces farther from the stove; and
- toe kicks or lower faces affected by spills.
Complete the full clean-rinse-dry sequence in one zone before opening another. A cabinet covered with wet cleaner while you work elsewhere is not “soaking safely”; it is experiencing longer exposure.
Use progress, not force, as your test. If each gentle pass transfers residue to the cloth and the finish remains stable, several rounds may be reasonable. If no residue transfers, the mark may be finish damage, cured coating, smoke discoloration, adhesive, or another material that routine cleaning will not solve.
At that point, identify the residue and contact the cabinet maker, installer, refinisher, landlord, or other appropriate professional. A stronger solvent may be compatible with one manufacturer’s finish and destructive to another. General advice cannot make that decision for an unidentified surface.
Pay Attention to the Range-Side Cabinet—Without Expanding the Job
Cabinets beside and above a stove often collect the heaviest film, but they also sit near heat, steam, seams, lighting, electrical components, and the range hood.
Turn off and cool nearby cooking surfaces before cleaning cabinet faces. Do not lean across a hot element, allow cloths to contact a flame or heating surface, or spray cleaner toward controls, lights, outlets, or ventilation equipment.
Keep the boundary clear: this article covers the cabinet exterior. A range hood’s removable filter, fan housing, lighting, ductwork, and electrical parts follow the appliance manufacturer’s instructions. Likewise, cleaning inside an oven is a separate task with different product, ventilation, temperature, and self-cleaning-cycle decisions.
If grease rapidly returns even though cabinet faces are wiped regularly, review how and when the hood is used, whether its filter needs manufacturer-directed service, and whether ventilation is functioning as intended. Do not dismantle or modify ventilation equipment based on a general cabinet-cleaning guide.
Avoid the Shortcuts Most Likely to Cause Damage
Several appealing shortcuts trade a faster visible result for a higher risk of finish damage or chemical exposure.
Do not assume stronger means better
A concentrated degreaser may cut cooking oil but also affect paint, topcoat, adhesive, laminate edges, plastic trim, or hardware. Use it only if its label includes the surface and the cabinet manufacturer permits it. Test first.
Do not scrub with an abrasive material
Powders, rough sponges, scouring pads, and some stain-removing foams work partly through abrasion. A small loss of sheen may not be obvious until the door dries or catches side light.
Do not let water collect at edges
Liquid can travel into seams, joints, screw holes, veneer edges, or damaged coating. A wet door may look fine initially and swell or lift later. Control the cloth and dry promptly.
Do not use polish to hide remaining grease
Some waxes, oils, and silicone-containing polishes can create buildup, change sheen, or complicate later refinishing. KraftMaid cautions that wax or silicone polishes may build up or harm the finish.[2] Use only a product the finish maker recommends.
Do not disinfect as a substitute for cleaning
Grease and dirt are removed through cleaning. A disinfectant has a different purpose and must remain on a compatible surface for its labeled contact time to work. Routine cabinet degreasing does not become more effective because bleach is added. If a health situation calls for disinfection, first confirm that the product is appropriate for the surface and follow its label.[3]
Decide What “Done” Means for This Session
When grease has accumulated across a kitchen, “clean every cabinet” is too vague. Set a stopping point that restores useful control:
- the two doors closest to the stove;
- all handles and the narrow area around them;
- one bank of upper cabinets; or
- one 20-minute session followed by rinsing, drying, and putting supplies away.
The time is a boundary, not a universal cleaning recommendation. A detailed door may take longer than a flat one, and a fragile finish may require professional advice rather than more time.
Close the session completely. Rinse or launder reusable cloths according to their care instructions, put products away in their original containers, remove any food or cookware moved during cleaning, and leave the stove area safe to use.
Jerome’s kitchen improved when the household stopped treating cooking and cleanup as one person’s invisible extension of the meal. He and his wife divided cooking and dishwashing responsibilities more clearly. That broader division belongs to the household’s own circumstances, but the principle applies here: a maintenance plan works only when its total workload fits the people expected to carry it.
For cabinet grease, that may mean assigning one person to wipe the range-side doors after a high-splatter meal, alternating a weekly check, or simply agreeing that whoever notices a fresh splatter removes it while it is easy. The point is not a perfect rule. It is preventing a two-minute wipe from becoming another large recovery project.
Reduce the Next Round of Buildup
You cannot keep a working kitchen free of all residue, and that should not be the standard. You can make the next cleaning easier.
- Wipe fresh oil or food splatters promptly with a surface-compatible method.
- Use the range hood as directed by its manufacturer while cooking.
- Check the cabinet edge and handle nearest the stove more often than distant doors.
- Dry steam or water that condenses on cabinet faces.
- Keep one clean, appropriate cloth accessible, but store cleaners securely.
- Choose a brief condition trigger—such as “when the handle feels tacky”—instead of waiting for the whole kitchen to look dirty.
MasterBrand notes that prolonged exposure to food, water, grease, and oil splatters can damage or discolor a cabinet finish.[1] The most useful prevention is therefore not an elaborate schedule. It is removing fresh residue before it hardens and holds more dust.
When Cleaning Is No Longer the Right Solution
Stop routine degreasing and seek material-specific help when:
- paint or stain transfers to the cloth;
- the finish softens, becomes tacky, clouds, or changes sheen;
- veneer or thermofoil is lifting;
- seams or panels are swollen;
- raw wood or substrate is exposed;
- grease appears to have penetrated a damaged finish;
- the residue may be smoke, adhesive, pest contamination, or an unknown chemical; or
- safe access requires climbing, reaching over hot equipment, or handling electrical or ventilation parts.
Refinishing, repair, ventilation service, pest remediation, and cabinet replacement are different decisions from cleaning. Continuing to scrub can erase the evidence needed to identify the underlying problem and increase the repair area.
Decision Summary
To degrease kitchen cabinets without creating a larger problem:
- Identify the material and follow the cabinet maker’s care instructions.
- Inspect for existing damage and test an inconspicuous area.
- Begin with warm water and a soft cloth; add only a permitted mild cleaner when needed.
- Apply solution to a well-wrung cloth rather than saturating the cabinet.
- Work one small section at a time with gentle passes.
- Wipe away cleaner residue and dry every section promptly.
- Stop if the finish changes or the buildup does not respond safely.
- Prevent another large job by removing fresh splatters and checking the range-side surfaces more often.
A kitchen that is used every day will show evidence of cooking. The goal is not to make that ordinary life invisible. It is to keep the residue manageable without sacrificing the cabinet finish—or turning one delayed task into a discouraging cycle.
FAQ
What is the safest way to remove grease from kitchen cabinets?
Check the cabinet maker’s instructions, test an inconspicuous area, and begin with a clean soft cloth dampened with warm water. If permitted and needed, use a small amount of mild hand-dishwashing liquid in water. Wipe with a clean damp cloth and dry promptly.
Can I use dish soap on wood or painted kitchen cabinets?
Some cabinet manufacturers permit a mild hand-dishwashing-liquid solution on intact stained or painted finishes, but finishes vary. Follow the maker’s instructions and test first. Do not assume a method suitable for one wood or painted cabinet is safe for another.
Can I spray degreaser directly onto cabinet doors?
Applying a compatible solution to a well-wrung cloth usually offers better moisture and overspray control. Use a spray only when both the cleaner label and cabinet maker permit that application method.
Should I use vinegar and baking soda on greasy cabinets?
Not without finish-specific approval. Acidity, alkalinity, abrasion, moisture, and additives can affect a cabinet coating or edge. “Natural” does not mean compatible with every surface.
Why are my cabinets still sticky after cleaning?
The cloth may be redistributing grease, detergent residue may remain, a polish may have built up, or the finish itself may be deteriorating. Use fresh cloth sections, complete the clean-water wipe and drying steps, and stop if the finish remains tacky or changes.
Do kitchen cabinets need to be disinfected after degreasing?
Usually, routine grease removal is a cleaning task. If a specific illness or contamination situation calls for disinfection, first verify that the product is suitable for the finish and follow its label. Never mix disinfectants with other cleaners.
References
[1] How to Clean Kitchen Cabinets, MasterBrand Cabinets. Accessed July 31, 2026.
[2] Dos and Don’ts of Kitchen Cabinet Cleaning and Care, KraftMaid Cabinetry, December 9, 2021. Accessed July 31, 2026.
[3] Cleaning and Disinfecting with Bleach, U.S. Centers for Disease Control and Prevention, April 24, 2024. Accessed July 31, 2026.
This article provides general household cleaning information, not professional restoration, occupational-safety, poison-control, or medical advice. Cabinet materials and finishes vary. Follow the cabinet and cleaning-product manufacturers’ instructions, test an inconspicuous area, and seek qualified help for damaged finishes, unknown residues, unsafe access, or concerning chemical exposure.
More in This Cluster: Kitchen Cleaning
- How to Degrease Kitchen Cabinets Without Damaging Them (you are here)
- How to Clean an Oven Safely Without Damaging It
- How to Clean and Maintain a Dishwasher Properly
- How to Clean a Refrigerator Properly and Reset What You Store
- How to Remove Kitchen Sink Odours by Finding the Source
- How to Clean Kitchen Countertops Safely by Surface
- Kitchen Cleaning Mistakes That Spread Germs—and How to Stop Them