An oven can look like a simple enamel box, but cleaning it safely is not a one-method job. The correct approach depends on the model, its interior coating, the type of residue, and whether the appliance offers a self-clean or steam-clean cycle.
That distinction matters in homes where the oven works hard. EverydayWise founder Jerome has described how frequent home cooking helped his family control food costs while creating more grease and cleanup around the cooking area. That experience explains why oven soil can accumulate; it does not establish which cleaner or cycle is safe for a particular appliance. For that decision, the owner’s manual and product label remain the controlling sources.
Practical rule: Identify the oven and its approved cleaning options before choosing a cleaner. Begin with the least aggressive method that fits the soil, and stop if the appliance behaves abnormally.
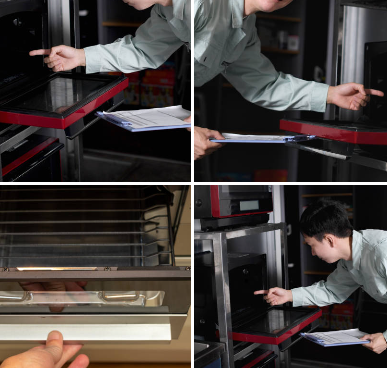
Start With the Model, Not the Stain
Before reaching for a spray, find the model number and the use-and-care manual. Similar-looking ovens can have different instructions for racks, liners, catalytic panels, door gaskets, steam cycles, and commercial oven cleaners.
Confirm four things:
- Is the oven conventional, self-cleaning, steam-cleaning, or fitted with another special lining?
- Which interior surfaces may be cleaned manually?
- Must the racks and accessories come out before a cleaning cycle?
- Does the manufacturer permit a commercial oven cleaner?
This is not administrative fuss. One manufacturer may direct the user to remove every rack before self-cleaning, while another may allow only a specifically designed self-clean rack to remain. A cleaner approved for bare porcelain enamel may damage a special coating, heating element, temperature sensor, gasket, or aluminum component.
If you cannot identify the model, limit the work to loose-debris removal and gentle wiping of clearly accessible, cool surfaces until you obtain appliance-specific guidance. Do not treat an internet recipe as a substitute for the manual.
Decide Whether the Oven Is Ready to Be Cleaned
Clean only when the oven is off and fully cool unless the manual explicitly instructs you to begin a cycle at another condition. Remove children and pets from the immediate work area. Improve ventilation before using a labelled chemical cleaner or running a cycle that may produce odors or smoke.
Pause before cleaning if you notice:
- a gas odor;
- damaged wiring, a cracked element, or loose electrical parts;
- a damaged or displaced door gasket;
- broken glass or a door that does not close properly;
- repeated error codes or a cleaning-cycle lock problem;
- evidence of a recent oven fire; or
- heavy liquid or grease in a place you cannot safely reach.
These are not “scrub harder” problems. Turn the appliance off and follow the manufacturer’s shutdown or service guidance. If you smell gas, leave the area and follow the gas utility or emergency authority’s instructions; do not operate switches or attempt a cleaning cycle.
Remove What the Manual Says to Remove
Once the oven is cool, take out cookware, foil, liners, probes, thermometers, and loose accessories. Check the manual before removing or leaving racks in place. Whirlpool, for example, instructs users of many self-cleaning models to remove racks and other utensils and to wipe out loose soil before the cycle.[1] Model-specific instructions always take priority.
Use a dry paper towel, soft brush, or manufacturer-approved vacuum method to lift crumbs and loose carbon. Do not push debris into vents, burner openings, fan slots, or the door mechanism.
Remove pools of grease and large food deposits before any high-heat cycle. A self-clean cycle is not a disposal method for a pan of grease, melted plastic, or a large sugary spill. Excess soil can create heavy smoke and may ignite.
Match the Method to the Soil
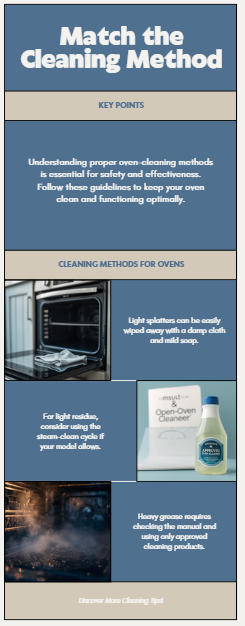
Light splatter or a recent spill
For small, fresh marks on a surface the manual permits you to wipe, a soft cloth with warm water may be enough. If allowed, add a small amount of mild dish soap. Apply liquid to the cloth rather than flooding the cavity. Wipe again with a clean damp cloth so soap does not remain, then dry.
Avoid the heating elements, igniters, fans, vents, sensors, and electrical openings unless the manual gives a cleaning procedure for them. Do not remove a heating element merely to gain access.
Baked-on residue
When a spill has hardened, give an approved gentle method time to soften it. A model with a built-in steam-clean function may use a measured amount of water and a programmed low-heat cycle. The amount of water, rack position, duration, and finishing steps vary by model; Whirlpool and GE instructions demonstrate why the manual must supply those numbers rather than a generic article.[2][3]
If the oven has no approved steam function, do not assume that placing a bowl of water in a hot oven recreates one safely. Use only a method permitted by the manufacturer.
After residue softens and the oven is cool enough to touch, lift it with a nonabrasive pad or tool approved for the surface. Work in small areas. Repeated mild passes are safer than forcing a scraper into an unfamiliar coating.
Heavy grease or widespread carbon
Heavy buildup requires a decision, not simply a stronger product. Check whether the manual permits:
- a self-cleaning cycle;
- a specific commercial oven cleaner;
- a manual paste or detergent method; or
- professional service because the residue is near protected components.
If the product or method is not expressly compatible, do not improvise. “Natural,” “fume-free,” and “heavy-duty” are marketing descriptions, not proof of surface compatibility.
Using a Commercial Oven Cleaner
A commercial oven cleaner can be appropriate only when both the oven manufacturer and the product label allow it.
Read the entire label before opening the container. Follow its requirements for gloves, eye protection, ventilation, application distance, contact time, rinsing, and disposal. Keep the product in its original container and away from children and pets. Health Canada advises consumers to follow household-chemical labels, understand hazard symbols, store products securely, and never mix household chemical products.[4]
Protect adjacent floors and cabinet surfaces without blocking appliance vents. Do not spray onto heating elements, pilot openings, igniters, fans, temperature sensors, light sockets, door seals, aluminum trim, or electrical connections unless the manual and label specifically permit it.
Never combine oven cleaner with bleach, ammonia, vinegar, another cleaner, or a homemade formula. A second product can react with residue from the first even if they are not poured together at the same moment. Complete the required rinse and allow the area to ventilate before using anything else.
Rinsing is part of the cleaning method, not an optional cosmetic step. Continue with clean damp cloths as directed until cleaner and loosened soil are removed. Do not restart the oven while a chemical film, pooled liquid, or strong unexplained odor remains.
Should You Use the Self-Cleaning Cycle?
Self-cleaning uses very high heat to reduce compatible food soil to ash. It can reduce manual scrubbing, but it is not automatically the safest choice for every oven, household, or level of buildup.
Use the cycle only if:
- the manual confirms the feature and the oven is in serviceable condition;
- removable items and excess soil have been cleared as instructed;
- the room can be ventilated;
- someone can remain home and attentive;
- children and pets can stay away from the hot appliance; and
- the cycle will not conflict with a manufacturer warning, service issue, or household respiratory concern.
Do not coat the cavity with commercial cleaner before a self-clean cycle unless the manual explicitly says to do so. Some manufacturers warn that oven-cleaner residue can damage the interior during high heat.[1]
Expect the door to lock and exterior surfaces to become hot. Do not force the door, block vents, hang towels on the handle, or leave combustible items nearby. Some odor or light smoke can occur, especially when soil remains, but that does not mean every amount of smoke is normal.
A special warning for birds
Some appliance manuals warn that fumes from self-cleaning can be extremely dangerous to birds and direct owners to move them to another closed, well-ventilated room.[1] Because sensitivity and home layouts vary, bird owners should follow the exact appliance warning and seek avian-veterinary guidance when uncertain. Merely moving a cage a few feet away is not equivalent to following the warning.
For other pets, keep them away from the appliance, hot surfaces, cleaners, and fumes, and follow both the manual and product label.
Steam Clean Is Not the Same as Self-Clean
A built-in steam-clean cycle generally uses lower heat and water to soften lighter soil. It is usually shorter and still requires wiping afterward. It is not designed to turn substantial grease and carbon into ash.
Self-clean is a high-heat process intended for heavier compatible soil. It generally takes longer, locks the door, and creates a greater heat and ventilation burden.
Neither setting is universally “better.” Steam clean may suit a recent light spill; self-clean may suit heavier compatible residue in a sound appliance; manual cleaning may offer the most control for a small area. The correct choice is the one the specific oven supports and the household can operate safely.
Clean the Door and Gasket Carefully
The inner glass, door edge, gasket, and frame may have separate rules. Do not assume that a cleaner safe for the enamel cavity is safe for glass, coated trim, or the gasket.
Wipe the permitted glass surface with an approved nonabrasive method. Avoid flooding openings at the top or bottom of the door, where liquid can enter between glass panels. Do not disassemble the door to chase a stain between panes unless the manufacturer provides a user procedure; oven doors are heavy, springs and hinges can injure, and incorrect reassembly can affect sealing.
Treat the gasket as a protected component. Many manuals warn against rubbing, moving, or saturating it. If it is torn, hardened, loose, or no longer seals, cleaning is unlikely to correct the problem.
Know What to Do if Smoke or Fire Appears
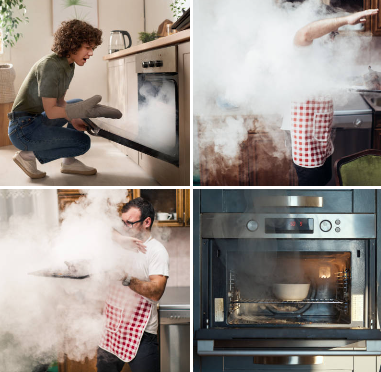
A small amount of odor is not the same as visible flames, rapidly increasing smoke, or an alarm condition. Stay near enough to notice changes, but do not touch or open a hot locked door.
For an oven fire, the National Fire Protection Association advises turning off the heat and keeping the door closed. If there is any doubt about controlling the fire, get everyone out, close the door behind you, and call the local emergency number from outside.[5] Never throw water into a grease fire.
After a fire, do not resume cooking or cleaning merely because the oven has cooled. Arrange inspection according to the manufacturer, fire authority, or qualified service professional.
A Controlled Manual-Cleaning Sequence
For an oven whose manual permits gentle manual cleaning, use this order:
- Cool and identify. Turn the oven off, allow it to cool, locate the manual, and check the approved surfaces and methods.
- Ventilate and clear the area. Keep children and pets away. Remove combustible objects from around the appliance.
- Remove approved parts. Take out cookware, liners, and racks as directed. Clean removable parts by their own instructions.
- Lift loose debris. Remove crumbs and loose deposits without pushing them into openings.
- Soften compatible soil. Use warm water, mild soap, an approved steam cycle, or a labelled cleaner only as authorized.
- Agitate gently. Use a soft cloth, nonabrasive pad, or approved scraper. Protect coatings and components.
- Rinse completely. Remove cleaner and loosened soil with clean damp cloths as required.
- Dry and inspect. Confirm that no liquid, cleaner film, tool, or debris remains. Reinstall only fully dry approved parts.
- Return to service cautiously. Follow any label or manual waiting period. Stop if there is abnormal smoke, a persistent chemical odor, sparking, an error code, or failure to heat normally.
When Cleaning Is No Longer the Right Task
Stop and seek manufacturer support or qualified appliance service when:
- residue is inside the door, insulation, burner, fan, electrical area, or another inaccessible space;
- the coating is flaking, badly pitted, or exposing another material;
- glass, a heating element, wiring, gasket, hinge, or lock is damaged;
- the self-clean door will not unlock after the documented cooling period;
- an error code returns;
- the oven smokes heavily after visible residue and cleaner have been removed; or
- a fire, gas leak, or significant chemical exposure has occurred.
Cleaning can remove soil. It cannot repair a failed component, restore a damaged coating, or establish that an appliance is safe after a fire.
Keep the Next Cleaning Smaller
Oven maintenance becomes more manageable when it is triggered by condition rather than guilt. Once the oven is cool, wipe a fresh compatible spill before the next heating cycle. Remove crumbs and check grease after roasting or broiling. Deal with a larger spill before it is baked repeatedly into the surface.
The practical lesson from a busy cooking household is not that the oven must always look unused. It is that cooking and cleanup consume the same limited household capacity. A short, safe response to a fresh spill can prevent a future session that demands high heat or harsh chemicals.
Decision Summary
- Find the model-specific manual before selecting a method.
- Clean only a cool, sound oven unless its instructions say otherwise.
- Remove loose debris, excess grease, and specified accessories first.
- Match manual wiping, steam clean, self-clean, or a commercial product to the oven and soil.
- Never mix household cleaners, and complete required rinsing.
- Treat the gasket, elements, sensors, vents, igniters, and door assembly as protected components.
- Ventilate, keep children and pets away, and follow special warnings for birds.
- If fire appears, turn off the heat, keep the oven door closed, leave if necessary, and call emergency services.
- Stop when the problem is damage, a malfunction, inaccessible contamination, gas, fire, or abnormal smoke—not removable soil.
FAQ
What is the safest way to clean the inside of an oven?
Find the model’s manual, let the oven cool, remove specified parts and loose debris, and use the least aggressive approved method. Avoid protected components, rinse any permitted cleaner as directed, and stop if the oven is damaged or behaves abnormally.
Can I use oven cleaner in a self-cleaning oven?
Only if the oven manual and cleaner label both permit it. Some manufacturers warn that commercial-cleaner residue can damage an oven during a self-clean cycle. Never assume “self-cleaning” means every cleaner is compatible.
Should oven racks stay inside during self-cleaning?
It depends on the model and rack type. Many manuals direct users to remove racks, while some ovens have racks specifically designed to remain. Follow the model-specific instructions.
Is steam clean the same as self-clean?
No. A built-in steam cycle normally uses water and lower heat to soften lighter soil and requires wiping afterward. Self-clean uses much higher heat to reduce compatible soil to ash. Exact procedures vary by model.
Is smoke during self-cleaning normal?
Some odor or light smoke can occur, especially if soil remains, but rapidly increasing or heavy smoke, visible flame, alarms, or abnormal appliance behavior require action. Turn off the heat if possible, keep the door closed for an oven fire, evacuate if needed, and call emergency services.
Is a self-cleaning cycle safe around pets?
Keep all pets away from the hot appliance and follow the manual. Birds require special caution because some manufacturers warn that self-cleaning fumes can be fatal to certain birds and direct owners to move them to another closed, well-ventilated room.
References
[1] Whirlpool Corporation. Owner’s Manual: Self-Cleaning Range — self-clean preparation, removal of utensils and racks, excess-soil reduction, oven-cleaner restrictions, ventilation, and bird warning. https://www.whirlpool.com/content/dam/global/documents/201110/owners-manual-W10366146-RevA.pdf
[2] Whirlpool Product Help. Steam Cleaning the Oven — model-specific preparation, water quantity, cycle, cooling, and wiping guidance. https://producthelp.whirlpool.com/Cooking/Wall_Ovens_and_Ranges/Ranges/Cleaning_and_Maintenance/Oven/Steam_Cleaning_the_Oven
[3] GE Appliances. Range & Wall Oven — Steam Clean — cool-oven preparation, model cycle steps, and post-cycle wiping. https://products.geappliances.com/appliance/gea-support-search-content?contentId=17334
[4] Health Canada. Healthy Home Guide — household chemical labels, safe storage, hazard symbols, exposure response, and prohibition on mixing products. https://www.canada.ca/en/health-canada/services/healthy-home/guide.html
[5] National Fire Protection Association. Safety with Cooking Equipment — oven-fire response and evacuation guidance. https://www.nfpa.org/education-and-research/home-fire-safety/cooking
This article provides general household-cleaning and safety information. Oven designs, coatings, fuels, cleaning cycles, and approved products vary. Follow the appliance manufacturer’s manual and each product label. For gas odors, fire, chemical exposure, damaged components, or abnormal appliance operation, stop and contact the appropriate emergency service, poison centre, manufacturer, or qualified technician.
More in This Cluster: Kitchen Cleaning
- How to Degrease Kitchen Cabinets Without Damaging Them
- How to Clean an Oven Safely Without Damaging It (you are here)
- How to Clean and Maintain a Dishwasher Properly
- How to Clean a Refrigerator Properly and Reset What You Store
- How to Remove Kitchen Sink Odours by Finding the Source
- How to Clean Kitchen Countertops Safely by Surface
- Kitchen Cleaning Mistakes That Spread Germs—and How to Stop Them