A refrigerator can look full and still fail at its basic job. A leaking package may be hidden behind a drawer. Leftovers may have lost their dates. Produce bought with good intentions may be deteriorating out of sight. When this happens, cleaning is not only about removing a smell or wiping a shelf. It is a chance to decide what is still safe, restore cold-air circulation, and make the food you already own easier to use.
EverydayWise founder Jerome encountered this while cooking frequently for a two-income immigrant household with two children. Buying ingredients in larger quantities initially seemed like an obvious way to reduce food costs. But when spoiled ingredients appeared in the refrigerator and pantry, the waste was frustrating as well as expensive. Over time, he learned that buying an amount the household could store, see, and use was often more economical than buying the largest package.
That is one household’s experience, not evidence that bulk buying is always wasteful. The useful question is broader: Does the amount you buy fit your storage space, cooking rhythm, and realistic consumption rate? A proper refrigerator reset makes that answer easier to see.
Practical rule: Protect the food first, clean according to the appliance manual, and restock only what remains safe, usable, and visible.
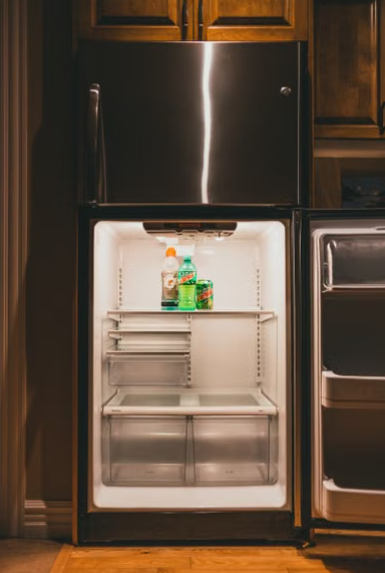
Start With Food Safety, Not the Cleaning Solution
Before removing a shelf, prepare a safe temporary place for perishable food. Use another working refrigerator or an insulated cooler with enough ice or frozen packs to keep food cold. Health Canada advises keeping refrigerators at 4°C (40°F) or lower and identifies 4°C to 60°C (40°F to 140°F) as the temperature danger zone in which bacteria can grow quickly.[1]
Gather what you need before opening the door for an extended period:
- insulated coolers or another refrigerator;
- ice or frozen packs;
- a refrigerator thermometer;
- clean cloths or non-scratch sponges;
- mild dish soap and warm water;
- dry, lint-free towels;
- shallow containers or trays for sorting; and
- gloves for leaking packages or broken glass.
Choose a time when the refrigerator is relatively empty—often before the next grocery trip. A smaller load is faster to sort, creates less temporary-storage pressure, and makes it easier to see what the household actually uses.
Do not start a full clean if you cannot keep vulnerable food cold. A quick spill cleanup may be the safer choice until you have a cooler, ice, and enough uninterrupted time.
Identify the Appliance Before Turning It Off
Find the model number and owner’s manual. Refrigerators differ in how cooling is disabled, how shelves and drawers release, whether glass or electronic components can enter a dishwasher, where drain openings are located, and whether condenser coils are accessible to the owner.
If the manual directs you to unplug the refrigerator or switch off cooling for a deep clean, follow its sequence. Pause the ice maker if required. Keep the plug and controls dry, and never pull the appliance forward by its doors or handles.
Stop and seek the appropriate service help if you notice:
- sparking, a scorched electrical smell, or repeated breaker trips;
- a damaged cord, plug, outlet, water line, or ice-maker connection;
- refrigerant-line damage or an unusual chemical odor;
- persistent water beneath or behind the appliance;
- a cracked shelf, broken support, or damaged door seal that cannot hold safely;
- temperatures above the safe range despite correct settings and closed doors; or
- heavy ice accumulation, fan impact, or repeated error codes.
Cleaning can remove accessible soil. It cannot repair a failed fan, sensor, compressor, seal, drain, water connection, or electrical component.
Sort Food With More Than a Smell Test
Work one shelf or zone at a time and move perishable items directly into cold holding. Do not leave everything on the counter while deciding.
Create four groups:
- Keep cold and return. Food is within safe storage guidance, packaging is intact, and temperature control has been maintained.
- Use soon. Food is still suitable but nearing its recommended storage period, quality limit, or household use-by plan.
- Freeze or repurpose promptly. The product is suitable for freezing or an imminent meal, and this choice fits official storage guidance.
- Discard. Food is spoiled, contaminated by a leaking package, held unsafely, subject to a relevant recall, or beyond a safety-based storage limit.
Health Canada cautions that unsafe food cannot always be identified by smell or taste.[2] Do not taste questionable food to test it. A “best before” date mainly concerns the durable life and quality of an unopened product; it is not a universal safety switch. At the same time, an acceptable date does not rescue food that was stored too warm, contaminated, or opened longer than recommended.
Use food-specific guidance rather than one rule for the entire refrigerator. Health Canada’s storage chart, for example, gives different refrigerated periods for ground meat, poultry, leftovers, eggs, dairy products, and produce.[2] If you do not know how long a high-risk item has been open or whether it stayed cold, caution is more useful than optimism.
Do not wash leaking raw-meat packaging and return it beside ready-to-eat food. Contain the package, assess the food using appropriate safety guidance, and isolate the affected refrigerator area for cleaning.
Remove Shelves and Drawers Without Creating Damage
Photograph the shelf layout if reassembly is not obvious. Empty door bins and drawers before lifting them, and use two hands for heavy glass.
Follow the model instructions for releasing each component. Do not pry a drawer rail or twist a glass shelf because it seems stuck. A hidden clip, wire, light, or temperature-control component may be attached.
Most importantly, allow cold glass shelves and covers to warm gradually before washing them. Sudden temperature change can cause tempered glass to break. Whirlpool’s care guidance specifically warns against applying hot water to cold glass and recommends warm water, mild dish soap, thorough rinsing, and complete drying for removable parts.[3]
If a shelf contains lighting, wiring, sensors, or trim that the manual says is not immersible, wipe it in place or use the prescribed method. Dishwasher suitability is also model-specific; a removable plastic bin is not automatically dishwasher-safe.
Clean From the Least Contaminated Areas Downward
Use a controlled sequence so cleaned surfaces are not immediately soiled again.
1. Remove loose debris
Lift crumbs and dry material with a clean cloth or soft brush. Do not sweep debris into vents, drains, fan openings, or drawer tracks.
2. Wash interior walls and accessible surfaces
Apply warm water with a small amount of mild dish soap to the cloth rather than spraying controls, lights, seams, or vents directly. Work from upper surfaces downward. Give dried spills time to soften instead of attacking them with a blade or abrasive pad.
Whirlpool recommends a soft cloth or non-scratch sponge, limited moisture around vents and controls, a clean-water rinse, and complete drying. Its guidance also warns against harsh or abrasive products on plastic parts, liners, and gaskets.[3]
3. Treat the contaminated zone separately
If raw meat, poultry, seafood, broken eggs, or another high-risk food leaked, keep dirty cloths away from already cleaned areas. Remove the soil first, wash the affected surface, and then follow applicable public-health guidance and the appliance manufacturer’s compatible sanitizing instructions.
Do not assume that more chemical means more safety. Never mix bleach, ammonia, vinegar, disinfectants, or other cleaning products. Do not use a sanitizer that the appliance manual prohibits, and follow label dilution, contact-time, rinse, ventilation, and protective-equipment directions.
4. Wash removable components
Use the sink or another suitable basin after checking material compatibility. Wash with warm—not abruptly hot—soapy water, rinse away residue, and dry completely. Use a soft brush for removable rails or corners only where the manufacturer permits it.
5. Clean the gasket gently
Crumbs and sticky residue can prevent an even door seal. Wipe the folds with mild soapy water on a damp cloth, rinse as needed, and dry thoroughly. Do not stretch the gasket or flood it. A torn, hardened, displaced, or persistently leaking gasket needs inspection or replacement rather than harder scrubbing.
6. Protect electronics and dispensers
Use a barely damp cloth around displays, touch panels, switches, water dispensers, and ice controls. Do not spray cleaner into them. Follow the manual for removing and cleaning dispenser trays, ice bins, or water-system parts.
Clean Coils and Drip Areas Only When They Are Owner-Accessible
Some refrigerators have accessible condenser areas that can be vacuumed or brushed; others are designed differently or do not require routine owner cleaning. The manual controls both the method and interval.
If owner maintenance is permitted:
- disconnect power as directed;
- protect the floor;
- use a vacuum attachment or soft coil brush without bending fins or damaging tubing;
- avoid water and cleaning chemicals around electrical and mechanical components; and
- reinstall every grille or cover before restoring power.
Whirlpool notes that accessible coils may be under or behind some models and can be cleaned with a vacuum and long soft-bristled brush.[4] That example is not permission to remove sealed panels or reach near moving parts on every refrigerator.
Treat drip pans, defrost drains, and drain tubes the same way: clean only components the manual identifies as owner-accessible. Persistent water, repeated blockage, mold in inaccessible cavities, or an overflowing pan can require service.
Dry, Reassemble, and Confirm Cooling Before Restocking
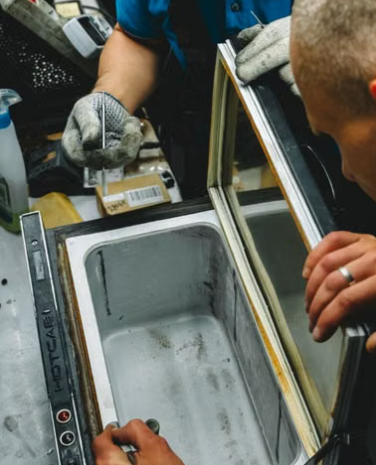
Moisture left in tracks, gasket folds, or shelf supports can dilute residue, freeze, create odor, or interfere with reassembly. Dry the liner and every removable component completely.
Reinstall shelves, drawers, rails, and bins in their correct positions. Confirm that each piece is stable before loading it. Restore power or cooling, restart the ice maker if appropriate, and verify that lights, fans, displays, and doors behave normally.
Use an appliance thermometer rather than relying only on how cold a drink feels. Public Health Agency of Canada guidance recommends keeping the refrigerator below 4°C (40°F) and using a thermometer to verify the temperature.[5] Follow the appliance manual for stabilization time after an extended shutdown. Keep perishable food in the cooler until the refrigerator is back within the safe range.
If the refrigerator does not resume cooling, do not repeatedly open the door or return vulnerable food in hope that it will recover. Protect the food elsewhere and troubleshoot or arrange service.
Restock for Safety, Airflow, and Visibility
Cleaning creates an empty space; restocking determines how long that space remains useful.
Separate raw food
Keep raw meat, poultry, fish, and seafood in sealed containers or bags on the bottom shelf so juices cannot drip onto other food. Health Canada specifically recommends separation and bottom-shelf containment.[1]
Leave room for air to move
Avoid packing food against vents or sensors. Health Canada advises against overstocking so cool air can circulate effectively.[1] The goal is not a sparse display refrigerator. It is a layout in which the appliance can cool and the household can see what needs using.
Put “use soon” food where it will be noticed
Create one visible area for suitable leftovers, opened products, and produce that should be used soon. Date containers when memory will not be reliable. Move newer duplicates behind older suitable items rather than scattering both across shelves.
Do not make the door a universal storage zone
The door experiences temperature changes each time it opens. Use the locations and compartment purposes described by the manufacturer, and reserve the coldest areas for foods that need them.
Return clean containers
Wipe sticky jars and bottles before restocking. A clean shelf will not remain clean if every container carries the previous spill back inside.
Turn Waste Into a Purchasing Signal
Jerome’s experience matters most at this point. The spoiled ingredients were not proof that cooking at home had failed or that bulk purchasing never works. They revealed a mismatch between purchase quantity and the household’s capacity to store, see, prepare, and consume the food.
After a refrigerator reset, record only what would change a future decision:
- an ingredient repeatedly discarded before use;
- a package too large for the household’s normal cooking cycle;
- duplicate items bought because the first package was hidden;
- produce stored in the wrong location;
- leftovers that regularly lose their identity or date; or
- insufficient freezer space for the intended bulk purchase.
Then choose the smallest useful correction. Buy a smaller size, split a bulk purchase with another household, freeze a suitable portion immediately, adjust the meal plan, or stop buying a product that consistently goes unused.
The unit price still matters, but it is not the whole cost. A lower price per kilogram saves money only when a useful amount is eaten or safely stored. The discarded portion, occupied space, cleanup burden, and chance of hiding other food all belong in the decision.
Use a Light Maintenance Rhythm
A refrigerator does not need to be fully dismantled every week. Use a condition-based routine:
During the week
- wipe fresh spills promptly;
- contain raw-food packages;
- check the “use soon” area;
- keep vents visible; and
- note any temperature or door-seal problem.
Before shopping
- scan leftovers and produce;
- check for duplicates;
- plan meals around suitable food already available; and
- choose quantities that fit the coming week and available storage.
When buildup or hidden food appears
- protect perishables in cold holding;
- clean one zone or complete a full reset;
- inspect the gasket and accessible appliance areas; and
- verify temperature after reassembly.
This rhythm is easier to maintain than waiting for odor, spoiled food, and crowded shelves to become one large project.
When Cleaning Is Not Enough
Seek qualified help when the refrigerator cannot maintain a safe temperature, leaks repeatedly, shows electrical damage, has a failed door seal or broken shelf support, develops inaccessible mold or drain blockage, makes new mechanical noises, or displays persistent error codes.
For food exposed by a power outage, prolonged temperature rise, appliance failure, floodwater, sewage, chemical contamination, or a recall, use the relevant public-health or recall guidance. Ordinary cleaning instructions are not a substitute for an incident-specific food-safety decision.
Decision Summary
- Arrange cold temporary storage before emptying the refrigerator.
- Confirm the model’s shutdown, shelf-removal, cleaning, and restart instructions.
- Sort food by safety, storage history, and realistic use—not smell alone.
- Let cold glass warm gradually before washing it.
- Use mild soap, limited moisture, non-abrasive tools, a clean-water rinse, and complete drying unless the manual directs otherwise.
- Separate high-risk spills and use only material-compatible sanitizing guidance.
- Clean coils, drains, and drip areas only when the manufacturer identifies them as owner-accessible.
- Verify 4°C (40°F) or lower before returning vulnerable food.
- Restock raw foods low and contained, leave space for airflow, and keep “use soon” food visible.
- Treat repeated food waste as information about purchasing quantity, storage, and cooking rhythm.
FAQ
How long can refrigerated food sit out while I clean?
Keep perishable food at 4°C (40°F) or lower in another refrigerator or an insulated cooler with adequate ice or frozen packs. Health Canada advises refrigerating or freezing vulnerable foods promptly and generally within two hours, but the safer cleaning plan is continuous cold holding rather than using the limit as a target.
Can I wash cold glass refrigerator shelves with hot water?
No. Sudden temperature change can break tempered glass. Let the shelf warm gradually, then use the temperature and method permitted by the refrigerator manual—commonly warm water and mild dish soap.
Can I use bleach inside my refrigerator?
Do not assume bleach is compatible. Check the appliance manual and any incident-specific public-health guidance. Whirlpool, for example, advises against bleach on specified interior parts. Never mix bleach with vinegar, ammonia, or another cleaner.
How do I know whether food is still safe?
Use the food type, opening date, recommended storage period, temperature history, packaging condition, contamination, and recall status. Smell or appearance alone cannot establish safety, and questionable food should not be tasted as a test.
What temperature should a refrigerator be after cleaning?
Health Canada recommends 4°C (40°F) or lower. Use a refrigerator thermometer and follow the appliance manual’s stabilization instructions before returning vulnerable food after an extended shutdown.
Does buying in bulk always save money?
No. Compare the usable quantity—not just the unit price. Storage capacity, freezer space, household consumption, preparation time, and repeated disposal determine whether a large package actually reduces cost.
References
[1] Health Canada. “Food safety and you.” https://www.canada.ca/en/health-canada/services/general-food-safety-tips/food-safety-you.html
[2] Health Canada. “Safe food storage.” https://www.canada.ca/en/health-canada/services/general-food-safety-tips/safe-food-storage.html
[3] Whirlpool Product Help. “Cleaning the Interior of the Refrigerator.” https://producthelp.whirlpool.com/Refrigeration/Full-Size_Refrigerators/Product_Info/Cleaning_and_Care/Cleaning_the_Interior_of_the_Refrigerator
[4] Whirlpool. “How to Clean a Refrigerator in 4 Simple Steps.” https://www.whirlpool.com/blog/kitchen/how-to-clean-a-refrigerator.html
[5] Public Health Agency of Canada. “General Food Safety Tips.” https://www.canada.ca/en/public-health/services/food-safety/general-food-safety-tips.html
This article provides general household cleaning and food-safety information. Appliance designs, food histories, public-health instructions, and cleaning-product labels vary. Follow your refrigerator manual, product labels, recall notices, and local public-health guidance; obtain qualified service for electrical, cooling, refrigerant, water-line, or inaccessible-component problems.
More in This Cluster: Kitchen Cleaning
- How to Degrease Kitchen Cabinets Without Damaging Them
- How to Clean an Oven Safely Without Damaging It
- How to Clean and Maintain a Dishwasher Properly
- How to Clean a Refrigerator Properly and Reset What You Store (you are here)
- How to Remove Kitchen Sink Odours by Finding the Source
- How to Clean Kitchen Countertops Safely by Surface
- Kitchen Cleaning Mistakes That Spread Germs—and How to Stop Them